
Hanging curtains sounds simple until you realize your brackets are too low, too close to the frame, or completely uneven. It happens more often than you'd think.
Knowing where should curtain rod brackets be placed can save you from extra holes in your wall and curtains that just don't hang right.
This guide walks you through exact measurements, spacing rules, common mistakes, and expert tips so you get it right the first time.
Whether your window is standard, wide, or a sliding door, you'll find the answers here. Good placement makes a real difference in how your room looks and how your curtains function.
What Is the Standard Bracket Placement?
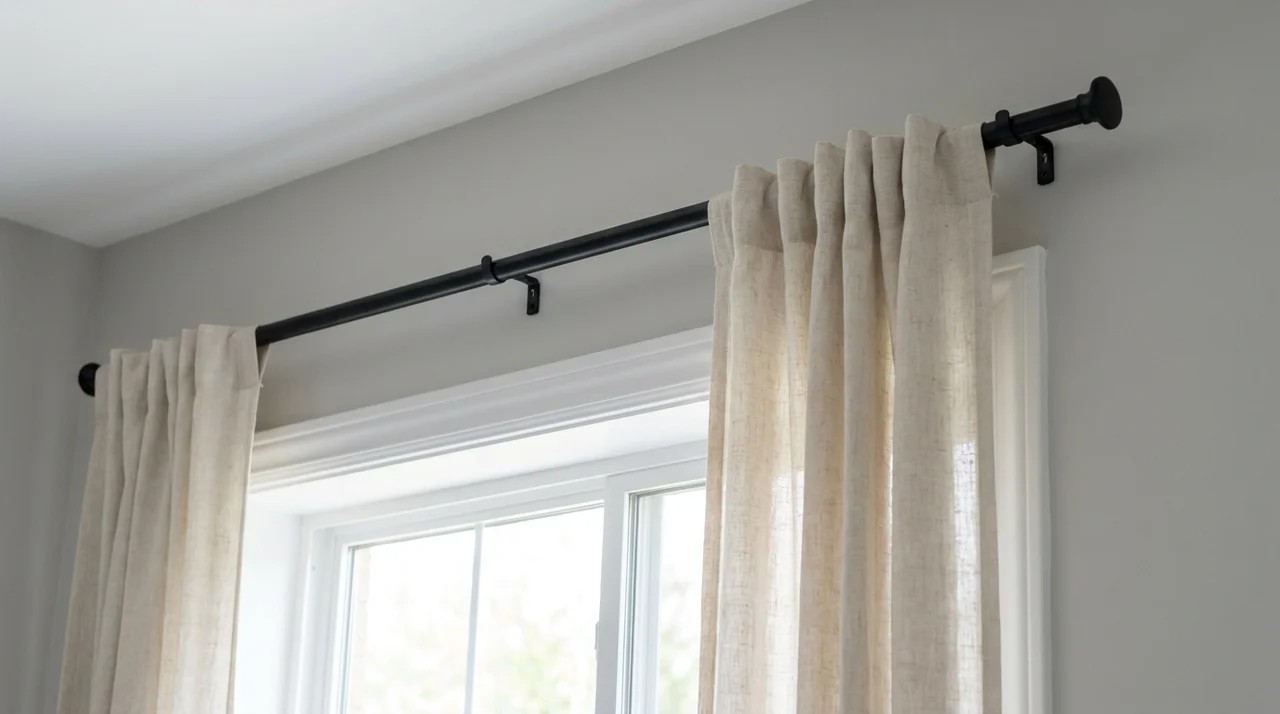
Most windows follow the same placement rules: go 4 to 6 inches above the frame and 3 to 6 inches outside each side edge.
Think of it like framing a painting. You don't hang the frame flush against the canvas. You give it room to breathe.
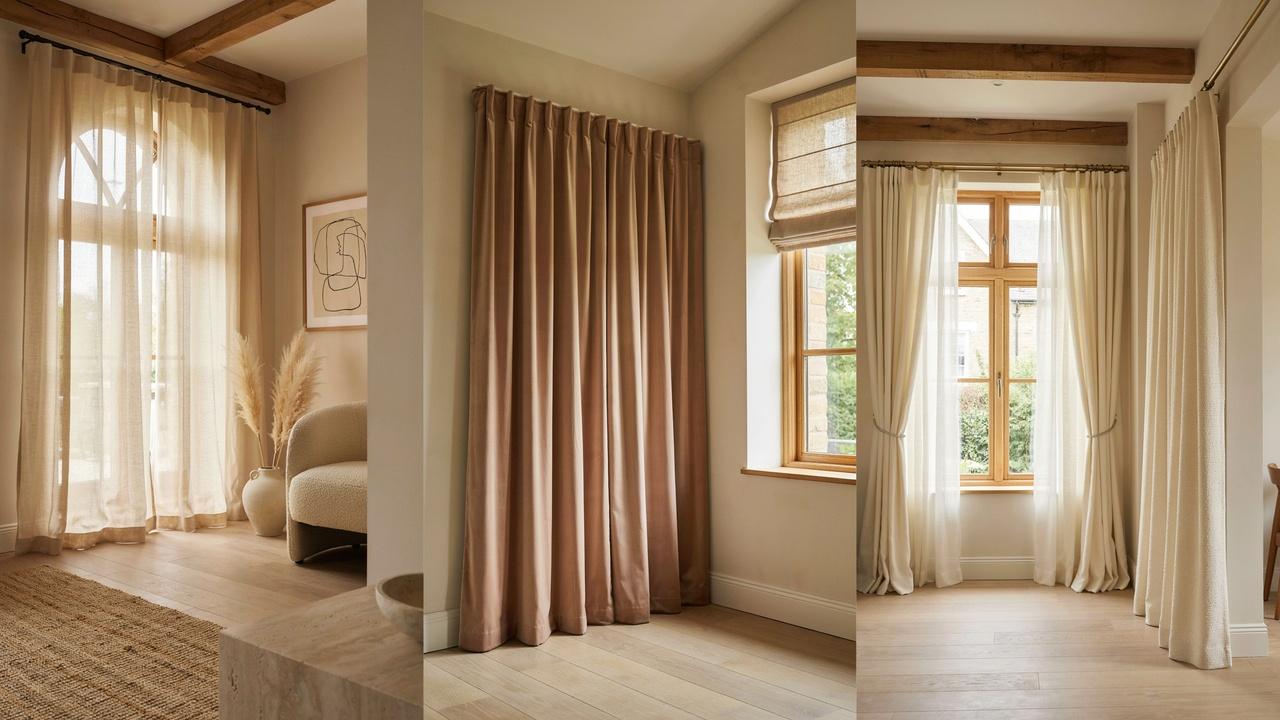
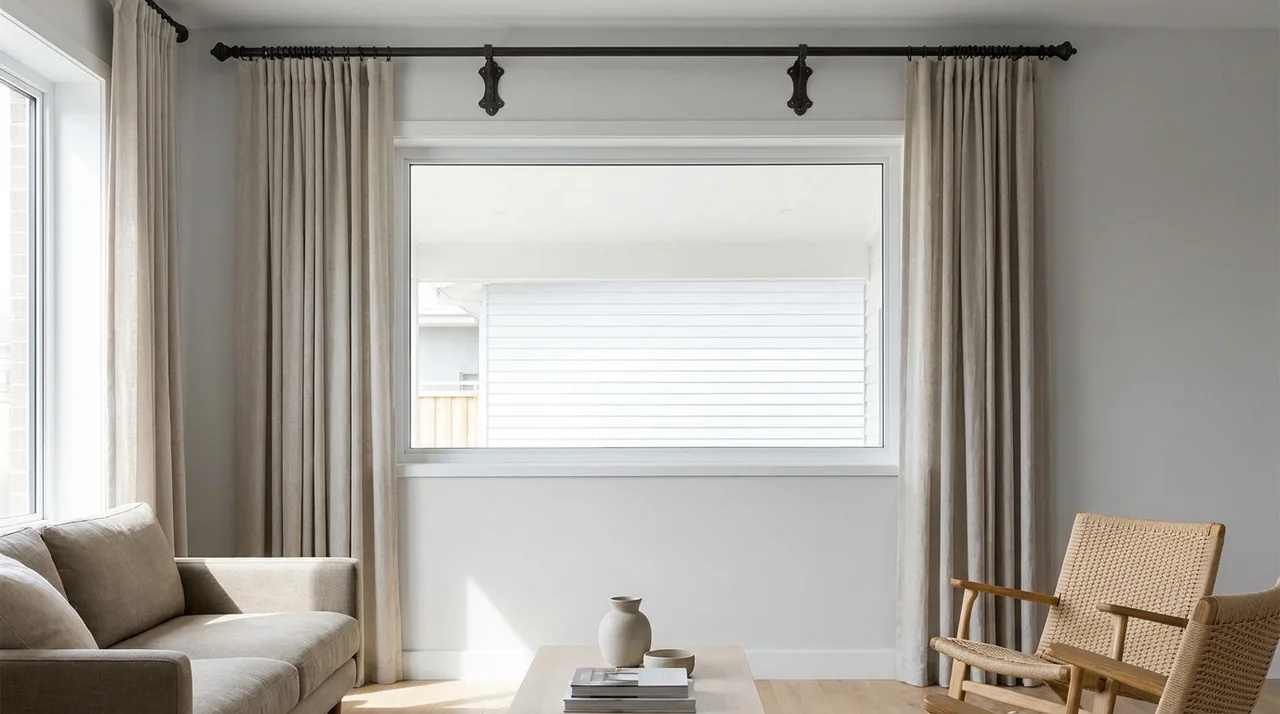
Mount your brackets 4 to 6 inches above the top of the window frame so the rod sits clear of the glass and the room feels taller.
For high ceilings, push that up to 12 inches or place the rod just below the crown molding for even more visual height.
Then move each bracket 3 to 6 inches beyond the outer edge of the frame on both sides so the curtain panels stack off the glass when open, pulling in more natural light and making the window look wider than it actually is.
Through all of this, both brackets must sit at the exact same height. A half-inch difference is all it takes for the rod to look crooked.
Always measure from a fixed point like the floor or the top of the frame, never by eye.
How Far Apart Should Curtain Rod Brackets Be?
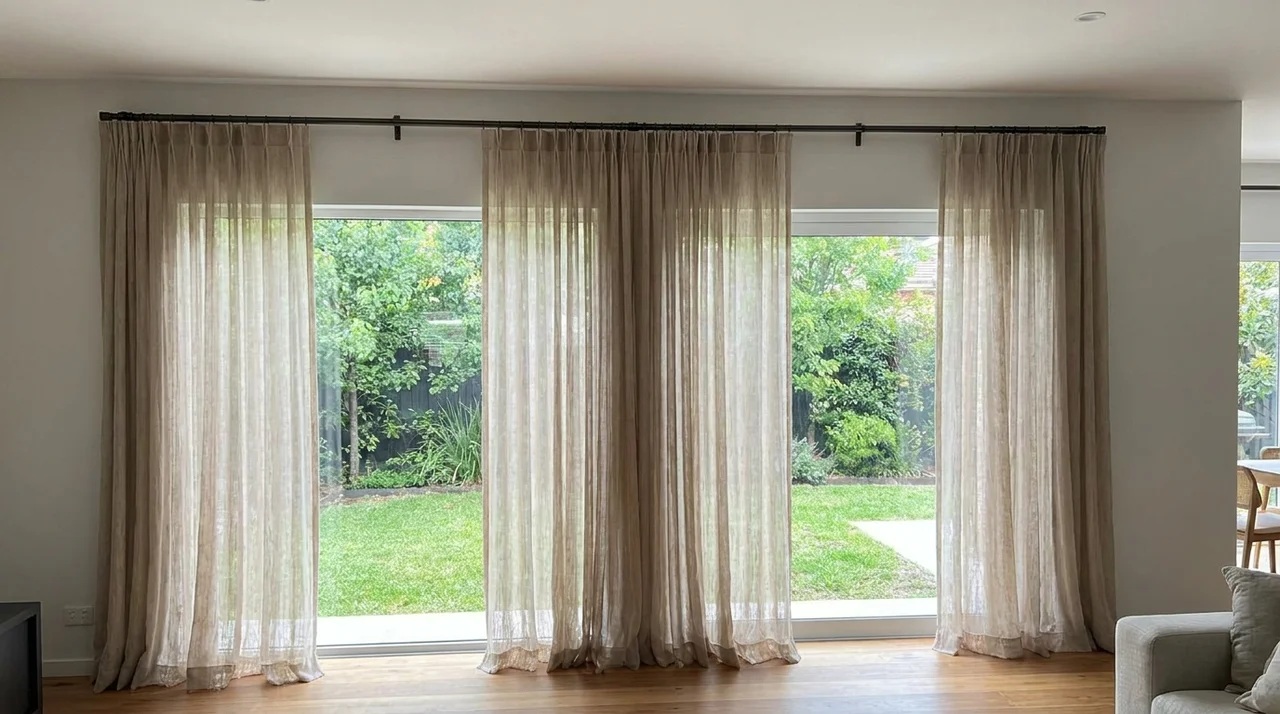
The distance between brackets depends on the rod length and how much weight it needs to carry.
Calculate Spacing Based on Rod Length
For rods up to 48 inches, two brackets are usually enough. Place one bracket about 4 inches from each end of the rod. This keeps the rod stable without bowing in the middle.
When Should You Add a Center Bracket?
Add a center bracket when your rod is longer than 48 inches. Without it, the rod can sag in the middle, especially with heavy curtains.
Most rods over 60 inches need at least one center support. If your drapery needs to stack all the way to one side, use C-rings so the panels can slide past the center bracket without bunching.
Account for Curtain Weight and Rod Strength
Heavier curtains put more stress on the rod and brackets. Velvet, blackout fabric, and lined panels weigh more than sheer or linen curtains.
If your curtains are on the heavier side, add a center bracket even on shorter rods to be safe. For layered setups with both sheers and heavier drapes, use double brackets so both rods share the same mount point.
How to Measure Bracket Placement Correctly
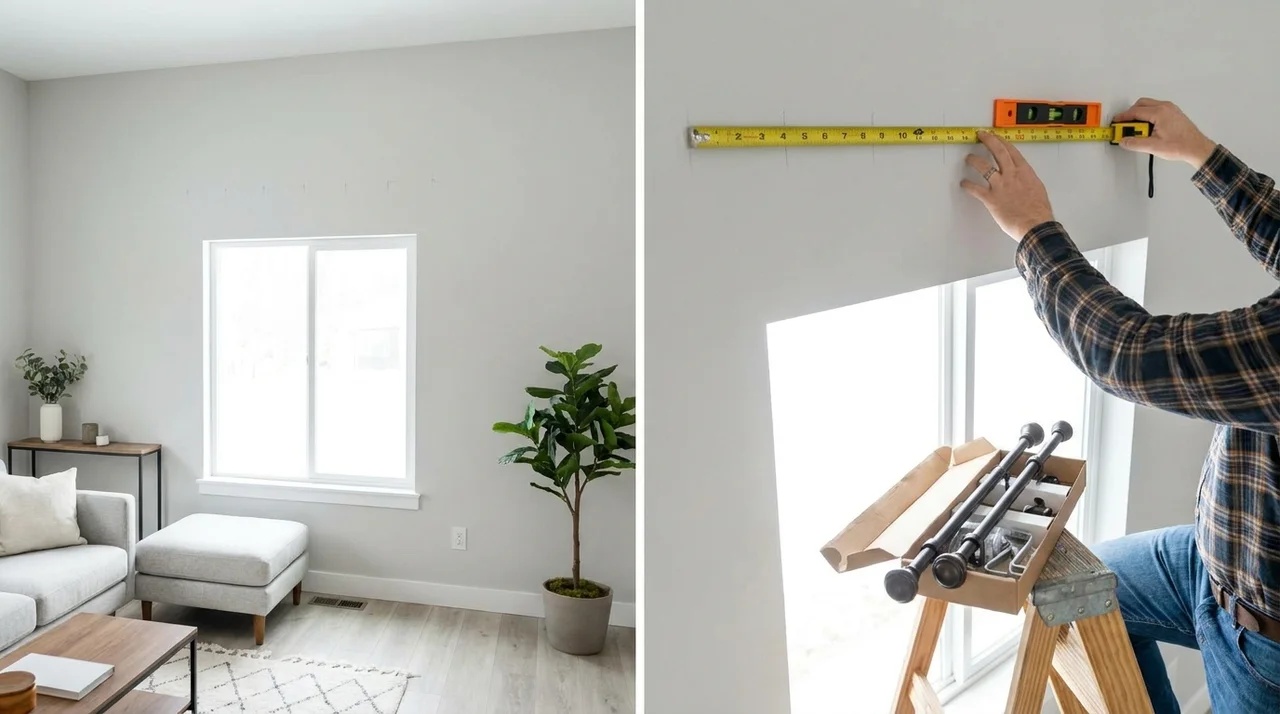
Getting your measurements right before you drill is the key step most people skip.
Measure Above the Window for Rod Height
Use a tape measure to mark 4 to 6 inches above the top of the window frame. Make a small pencil mark on both sides of the window at the same measurement.
Double-check that both marks are at the same height from the floor.
Measure Outward From the Window Frame
From each top corner of the frame, measure 3 to 6 inches outward and make another mark. This is where the center of your bracket will go. Keep the outward distance the same on both sides.
Mark Each Bracket Position Precisely
Hold the bracket against the wall at your marked spot. Use a pencil to mark through each screw hole. This gives you exact drilling points and prevents guessing.
Check Both Marks With a Level
Use a spirit level to confirm both bracket positions are even. Place it horizontally across both marks. Adjust if needed before drilling a single hole.
Where to Place Brackets on Different Windows
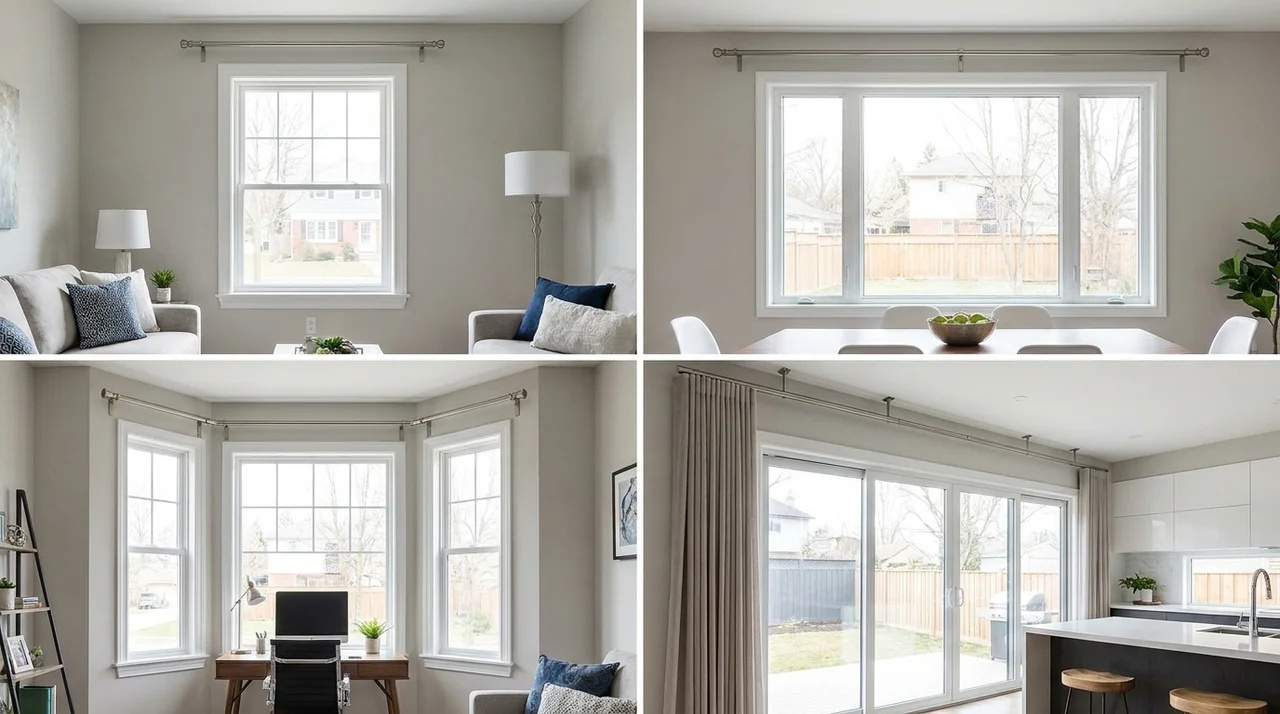
Not all windows are the same shape or size, so placement rules shift slightly depending on what you're working with.
For standard single windows under 48 inches wide, two brackets work fine using the standard rules, 4 to 6 inches above the frame and 3 to 6 inches out from each side.
Wide or oversized windows over 60 inches need a center bracket placed at the midpoint of the rod to prevent sag.
Bay windows require brackets at each turn of the wall, with angled or flexible rod connectors at the corners and a pair of brackets for every straight section.
If your window has thick or decorative trim, use extension brackets or longer screws so the rod clears the trim and the curtains hang flat against the wall.
For sliding glass doors, mount brackets at least 6 inches above and 6 to 12 inches outside the frame on each side so the curtains clear the full door opening and the panels have enough stack-back space to sit completely off the glass.
What Changes the Ideal Bracket Position?

Several factors affect where exactly you should place your brackets. Keep these in mind before finalizing your marks.
Curtain Length and Desired Floor Clearance
If you want your curtains to brush the floor or puddle slightly, measure from the floor up to find the right rod height.
Most people leave about half an inch of clearance between the curtain hem and the floor.
Curtain Header and Hanging Style
Curtains with grommets, rod pockets, or pinch pleats all hang at slightly different heights. A rod pocket panel will sit higher on the rod than a grommet panel.
Measure your curtain from the top of the header to the bottom before setting your bracket height. If you are unsure, hang the curtain from the rod before drilling so you can see the exact drop.
Blackout Curtain Clearance
Blackout curtains need to overlap the window frame on all sides to block light. Mount the brackets wider and higher than you normally would.
Going 6 inches above and 4 to 6 inches outside the frame gives better coverage.
Inside Mount vs Outside Mount
Inside mount brackets sit inside the window frame and are used for a fitted, built-in look. Outside mount brackets go on the wall above and around the window.
Most decorative curtains use outside mount placement. If drilling into the wall is not possible, no-drill brackets that tap into the top of the window frame are a solid alternative.
Wall Studs and Mounting Requirements
Always try to hit a wall stud when drilling. Studs give the screws something solid to grip. If studs are not in the right spot, use drywall anchors rated for the weight of your curtains and rod.
Toggle bolts work best for heavier loads in standard drywall.
Common Curtain Rod Bracket Placement Mistakes
These are the most common errors people make, and all of them are easy to avoid with a little planning.
Mounting Brackets Too Low
Brackets placed right at the top of the window frame make ceilings feel lower and windows look smaller. Go higher to give the room more visual space.
Placing Brackets Too Close to the Frame
If the brackets are too close to the frame, the curtains will cover the window even when pulled open. Move them out 3 to 6 inches so the panels stack clearly off the glass and natural light can reach the room.
Making the Two Sides Uneven
Uneven brackets make the rod look crooked and the curtains look messy. Always measure from a fixed reference point like the floor or the window frame top, and use a spirit level before drilling.
Ignoring Center Support Requirements
Skipping a center bracket on a long rod leads to visible sagging. This puts stress on the end brackets too and can eventually pull them loose from the wall.
Drilling Without Checking the Wall
Drilling into a pipe or electrical wire is a serious risk. Check for studs, pipes, and electrical wiring before drilling, using the appropriate detection method for your wall. It takes two minutes and prevents costly repairs.
Expert Tips for Better Bracket Placement
A few extra steps can make the whole process smoother and give you better results.
- Use a cardboard template before drilling. Trace your bracket, cut it out, and hold it against the wall to mark screw holes accurately without struggling to hold the real bracket steady.
- Check clearance before committing. Hold the rod in place after mounting brackets to confirm curtains will clear any trim, handles, or window locks.
- Match your anchor to the load. Toggle bolts work for heavy curtains in drywall. Plastic anchors suit lighter rods. Always check combined weight before choosing.
- Test the rod before hanging curtains. Snap it in and give it a shake. If it wobbles, tighten the screws or upgrade the anchor before adding any weight.
- Buy a few extra anchors and screws. It saves a second store trip if one strips or does not grip the wall as expected.
- Always cross-reference your chosen drapery hardware's installation guide. Rod and bracket systems vary, and the manufacturer's specs will tell you the exact spacing and load limits for your specific setup.
Conclusion
Getting curtain rod brackets in the right spot does not have to be complicated.
The key is to measure carefully, go high enough above the frame, extend far enough to the sides, and add center support when needed.
Knowing where should curtain rod brackets be placed gives your curtains a clean, polished look without extra holes or guesswork.
Take your time, use a level, and check your wall before drilling. If this guide helped you, share it with someone redoing their windows or drop a comment below with your results.
You can also check out related guides on choosing the right curtain rod and hanging curtains without a drill.
Frequently Asked Questions
Can I place curtain rod brackets without finding a stud?
Yes, use drywall anchors rated for your curtain and rod weight. Toggle bolts work best for heavier loads in drywall.
How many brackets does a 120-inch curtain rod need?
A 120-inch rod will typically need two end brackets and at least two center supports, depending on the rod strength and curtain weight.
Should both curtain panels hang from the same rod?
Yes, most setups use one rod for both panels. Each panel hangs from opposite sides and meets in the middle.
What type of screws should I use for curtain rod brackets?
Use 1.5 to 2-inch screws for studs. For drywall anchors, follow the anchor manufacturer's recommended screw size.
Can curtain rod brackets be mounted on tile or brick walls?
Yes, but you need masonry drill bits and appropriate anchors. Standard drywall screws will not hold in tile or brick.